

Prerequisite: You need to understand the basics of Git and why it’s useful. If you do not, don’t worry, I got you! At the end of this article, there is a link to a YouTube video explaining this.
Are you an aspiring Git Ninja? This series should get you up to speed with using Git. What I want to achieve with this article is to get YOU familiar with daily Git commands used, especially in a team/collaborative setting.
To get the most out of this series, I suggest you create a folder called Git Series in your browser bookmark panel and bookmark each post to that folder, so it’s easy to come back to 🙂
For those who love lists, these are the following git commands detailed in this piece:
PS: I like to call these commands “Happy Path Commands”, because I use these commands daily when everything is fine, and I have no issues with managing my code locally and in my remote repositories. I will get into other commands for squashing common git problems in future articles.
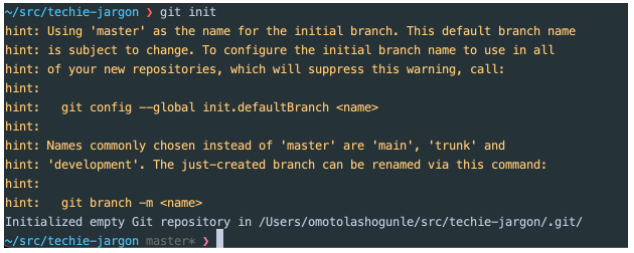
1) Git Init
There are two ways to create a GitHub Repository: you can either create a repo on GitHub first and copy the project to your local computer, or you can initialize your local project folder using this command `git init`. Once you run this command in any local folder on your computer, it automatically becomes a Git repository, and you can start tracking your file changes.

You see this error if you try to run other git commands on a repo that’s not initialized. Once you initialize the repo, you get this output message and an invisible `.git` folder added to the root of your repository.
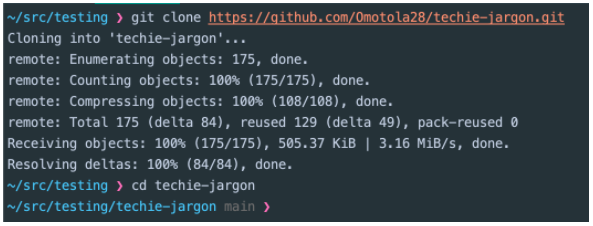
2) Git clone <url of repository>
Git clone is like downloading a project (folder with a lot of code) from a server, in this case (GitHub) to your local computer. This allows you to have the latest version of the remote project on your local computer. This is my preferred way of getting projects to my local machine, it makes things a lot easier. The command for this is:
`git clone https://github.com/Omotola28/techie-jargon.git`
and the output will look like this, or similar.
3) Git pull
`git pull` allows you to get the latest changes in the remote repository into your local computer. This is necessary because if multiple people are working on the same project remotely and someone on your team pushed their changes to the remote repo which you might be unaware of, it’s always good to pull those changes before you start work on your feature.
-> My general rule of thumb using `git pull`
Before branching off your main/develop branch to work on a fix or feature, do a pull then create your new branch.
The command when run looks like this. This works on any branch you would like to sync with your remote branches.

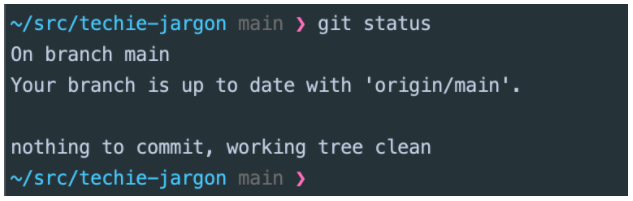
4) Git status
A simple but yet effective command allows you to see the current state of your branch. It displays information like:
5) Git branch
This shows you the branches, available on your local computer.

To see remote branches, use the `-r` flag and to see both local and remote branches use `-a` like so `git branch -r` or `git branch -a`.
6) Git checkout -b <nameofnewbranch>
Git works with branches; a branch is created from the main/master branch where your project code resides by default. When developer ‘A’ wants to work on a new feature but doesn’t want to change the current version of the software just yet, she creates a new branch and starts making changes on that branch until she is ready to add her changes to the main branch. It’s a great way to manage separation of concerns.
The `-b` says that we want to create a new branch as well as switch to it. To switch between existing branches, lose the -b flag.

Switch back to an existing branch like this:

Don’t know what branches exist in your local repository? Use command number 5 above 😉.
7) Git add
To add changes that you would like to save (commit) to your remote repository, you use the add command. You can add multiple files at once using the `.` notation, or you can add files individually by stating the file that you would like to add.
Add multiple files:

Add single file:

Using the add command, you can add files to the staging area. When you use `git status`, you will see the files are now green, meaning they are staged and reading to be committed.
8) Git commit -m “commit message”
To save the files you would like to push to the remote repository on GitHub, you use the commit command together with a helpful commit message. Once you reach a certain point when developing using the git, the commit command serves as a checkpoint to which you can return at another time.

9) Git push
This command pushes the local changes you have committed to the remote repository on GitHub.

To push for the first time in a branch we created locally that is not yet in our remote GitHub folder, we do this.

The `-u` flag is short for `–set-upstream` which tells git which branch you want to be the target branch for your current changes. Here, we set it to be `feature/BLO-990`
10) Git Diff
This command is used to see/compare changes you have made in files within your local project or between two branches. To see changes in untracked (files that have not been added using the git add command) files, use;

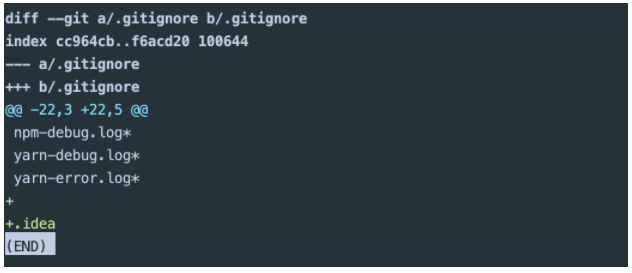
It will come up with an interactive page like this to show you the changes you have made to the untracked files. You can scroll to see changes in multiple files. To quit the display of changes, press `q`
If the files are tracked, use this command to see the changes made in tracked files. It should display a similar screen as shown above.

You can also compare branches using this command `git diff main feature/BLO-990`. However, I would recommend not doing this in a terminal. It’s better to compare changes when you push to your remote branch and would like to merge those changes into a different branch remotely. If you do this, GitHub will automatically compare both branches for you.
And there you have it! In the next post, we will tackle How to Raise a Pull Request (PR) on GitHub 🙂
See you soon! You can always message me on @mycodinghabits on Instagram or email me mycodinghabits@gmail.com if you have questions.
Useful Links
Difference between Git & GitHub